
Pairing a reader, performing a scan and uploading your inventory using the mobile app.
To perform a scan, you'll need the following:
- The Simple RFID mobile app, downloaded and logged in on your mobile device
- Your handheld RFID reader, with the battery inserted and charged
Scan Process
- Open the Simple RFID mobile app.
- Select the Add to Inventory option on the mobile app home screen, then select the location you'll be scanning your inventory in:


Pairing the Reader
If you've already paired your reader and set it to Auto-Reconnect, it should automatically connect after pulling the trigger to wake the reader. If so, you can skip the connection steps.
- From the Add to Inventory screen, tap the image of a reader located on the right side of the screen, then tap Add new Reader.
- If prompted, allow Simple RFID to access Bluetooth. After allowing, you may need to tap Add new Reader again.


Note: Be sure to enable Bluetooth on the mobile device that you are attempting to pair to your reader.
- Press the yellow trigger on the reader to wake the reader and place it in discovery mode.
While in discovery mode, the blue light on the left side of your scanner will flash slowly. Discovery mode will time out after 30 seconds if no connection is made, so if your reader turns off, just press the trigger again to wake it back up.
If the reader's blue light is solid blue, the reader is already connected to a host. Make sure that it's not already paired to any devices nearby or plugged into a computer.
- Wait a few moments for the reader to appear in the list of available Bluetooth devices, then tap on the reader to initiate the connection. It will appear as US-1128-[6 digit SN]
- Once it is connected, it will appear on the Reader page within the mobile app with the reader's serial number and firmware version.
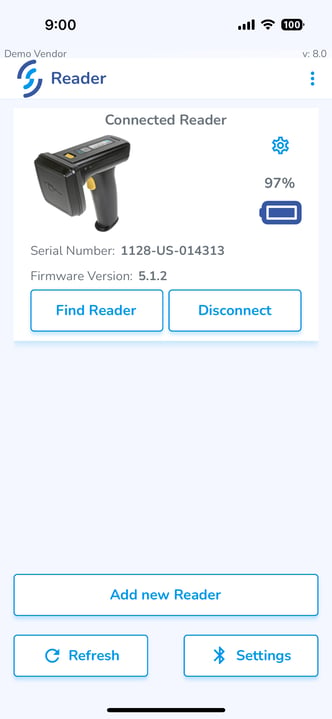
Reader Bluetooth Connection & Communication Settings
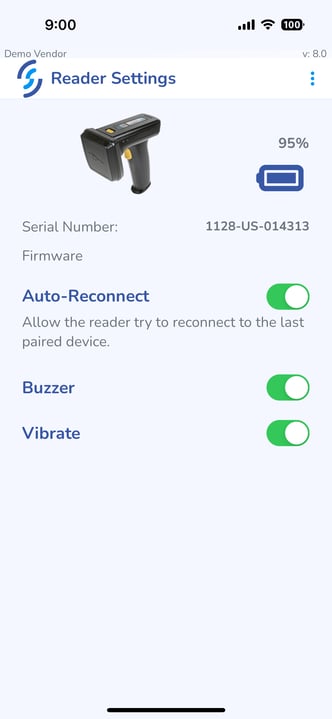
- Click the Gear icon to the right to open reader & connection settings.
- The top setting is Auto-Reconnect. When this setting is enabled the reader will attempt to pair with the app when the trigger is pulled, bypassing the Bluetooth pairing steps.
- The bottom two allow the user to turn off either the Buzzer, Vibrate, or both.
Power Settings
The power slider allows you to adjust the distance from which the reader will scan tags. We recommend using the highest power setting when performing most actions.
Setting this slider all the way to the left will scan with the least amount of power. This means that the reader will scan from roughly 6" away which makes it possible to scan specific items.

Scanning your labels
Point the scanner toward your RFID tags, and scan them in one of two ways:
a. Hold down the trigger on the scanner
OR
b. Tap the Start scanning button in on the mobile app to instruct the scanner to read continuously.
At any time during the scan, you can tap Show details at the bottom of the screen to see information about the items you've scanned so far.
RFID technology allows you to scan labels from a distance and through many objects. In most cases you will be able to easily scan from a few feet away, moving the reader deliberately across the items that you are attempting to scan.
If you're having trouble scanning tags, verify that your reader is connected to your mobile device and that the scan power is set to an appropriate level for the distance from which you are scanning.
Uploading
- After scanning your inventory, finish the process by pressing the Finish button at the bottom of the screen.
- The Comment field automatically contains information about the scan. If you wish, you can change and/or add information to this comment, which will be displayed on the Scan Sessions page on the web.
- Proceed to upload your items to your inventory by tapping Add to Inventory.


After learning how to scan and upload tags, you are all set to move on to Training 2.