
This article provides the steps to download fonts to a printer using Zebra Setup Utility.
https://supportcommunity.zebra.com/s/article/Zebra-Setup-Utilities--Downloading-Fonts-to-a-Printer?language=en_US
ISSUE / QUESTION
Downloading fonts to a printer using the Zebra Setup Utility.
APPLICABLE TO
Zebra Printers using driver v.5, excluding ZQ110, EM220, EM220II
RESOLUTION / ANSWER
| NOTE If you want to print using a particular font with ZebraDesigner, select the font from the list and create the label. The driver will convert all fields into graphic ZPL pieces of code, and you'll get the expected results on the label without any additional action required. Fonts are software governed by copyrights and require licensing. Check with your font provider for licensing details. |
The Zebra Setup Utility can be used to convert and download fonts stored on a Zebra printer and recalled later when printing labels.
See the User Guide: Zebra Designer Fonts and Graphics Downloader for full details on downloading fonts and graphics.
Procedure:
- Open the Zebra Setup Utility, select your printer and click Download Fonts and Graphics.

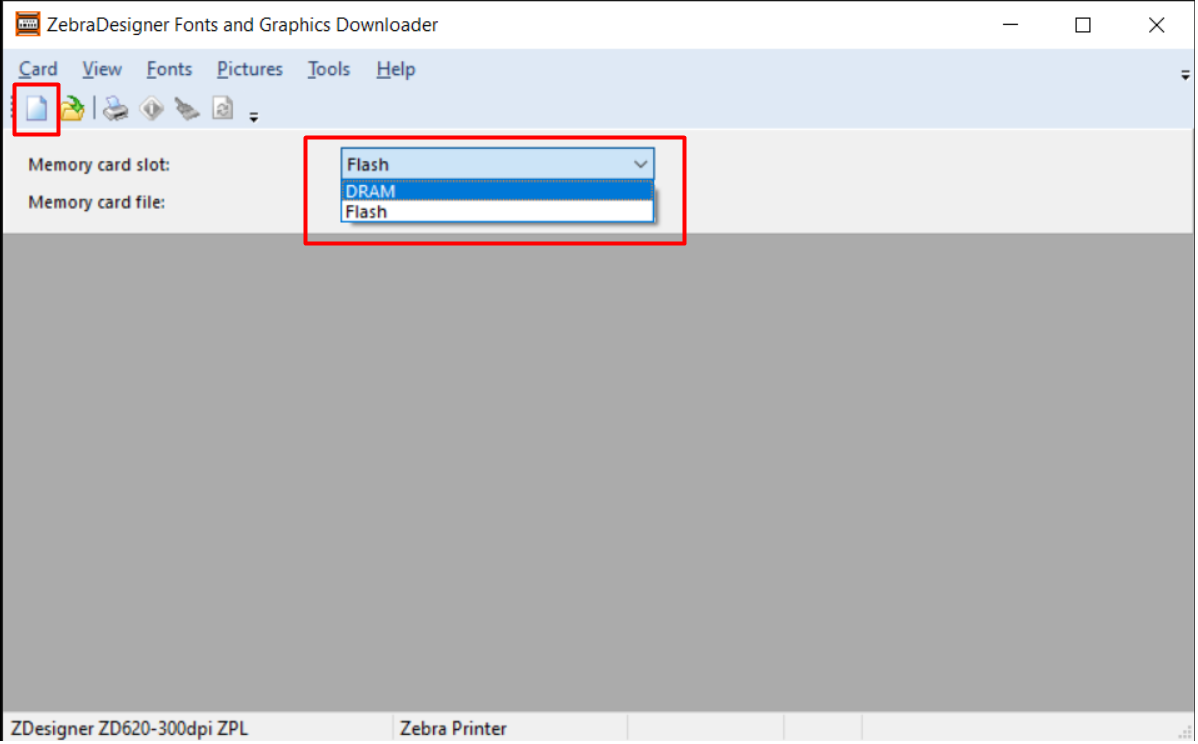
- From the Memory Card Slot drop-down list, select the memory device on the printer where you want to store the font:
- Flash memory is the one suggested. It corresponds to the E: drive, which is not volatile so that the font will store permanently in the printer memory.
- DRAM corresponds to the R: drive, which is volatile, so the font deletes once the printer reboots.
Next, you must create a memory card configuration file (.MMF) by selecting the New icon.
- Enter the filename and save the file. In this example, I have created a new card file called test.mmf.

- Enter the Description of the memory card (optional) and select the proper Card size. The card size will depend on your chosen font and the number of characters. You can choose between 256 and 131072 Kb.

- Your font memory card will now be listed in the Memory Card File selection: select font and Add. Then choose to Download all characters or Download selected characters.

- Choose the required font and click Select.

- You will now see the Font Data; click OK.

- If you've chosen to download only Selected Characters, you will see the Characters button in the bottom left corner.

- You can only select some characters or groups of characters from the list and move them from the Available field to the Selected area. In this example, I've chosen only the capital letters.

- You will now have the option to download the font to the printer by clicking Yes.

- You will now be asked to review the License Agreement for the font. Click I Agree, and the selected printer will download the font.

| IMPORTANT! If you get the error "There is not enough free space on the memory card to download," you must increase the card size before attempting to download again. |