
This article explains the methods available to print the same SKU more than once, with each containing unique EPC values, in the same print job.
Looking to print the same SKU but each tag must contain different EPC level information such as Lot #, Cost, or Expiration Date? There are two methods to generate these print jobs, manually inputting the details, and uploading a spreadsheet containing these details. We will demonstrate each below.
________________________________
1. Manually Input Details
The first method is to add items manually, one-by-one. To do this:
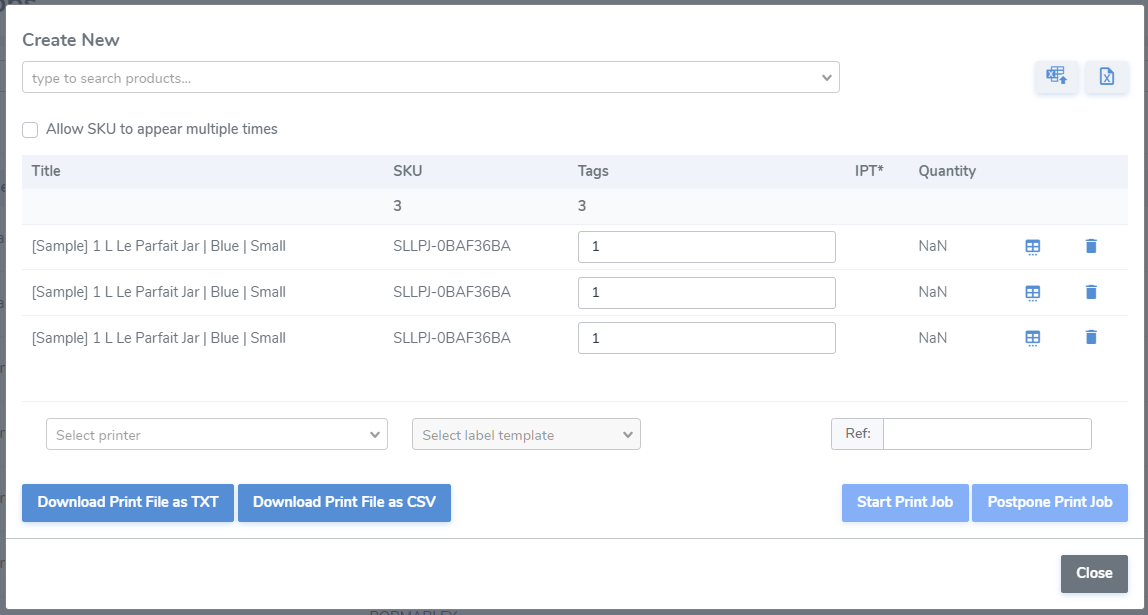
- Go to the Printing tab located on the left side menu.

- Select your location from the Location drop-down.

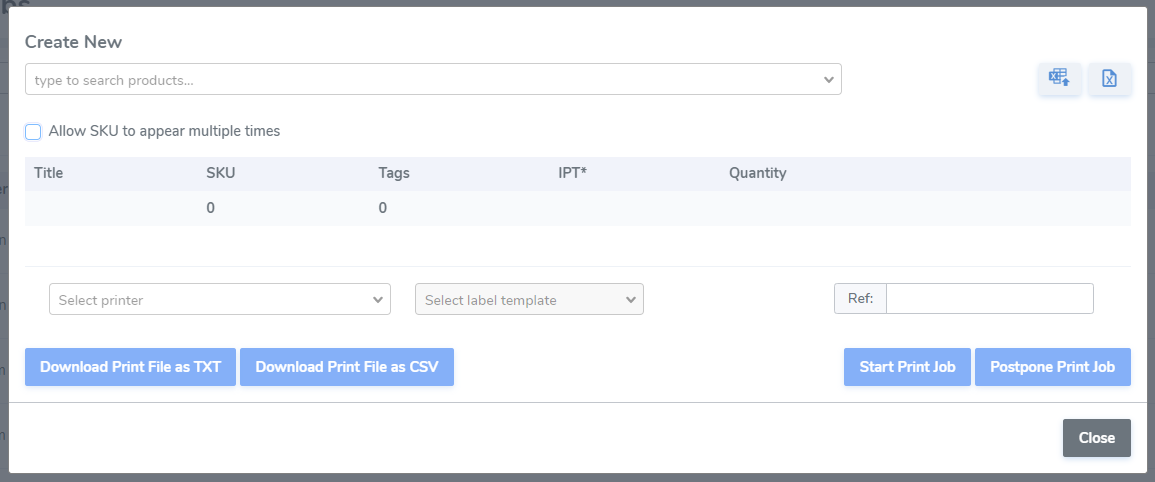
- Click the "+" icon to open the print controller pop-up.

- Check the box "Allow SKU to appear multiple times" which will allow the same SKU to be added to the job.

- Search for the SKU you wish to add, and select it multiple times to add the needed quantity.

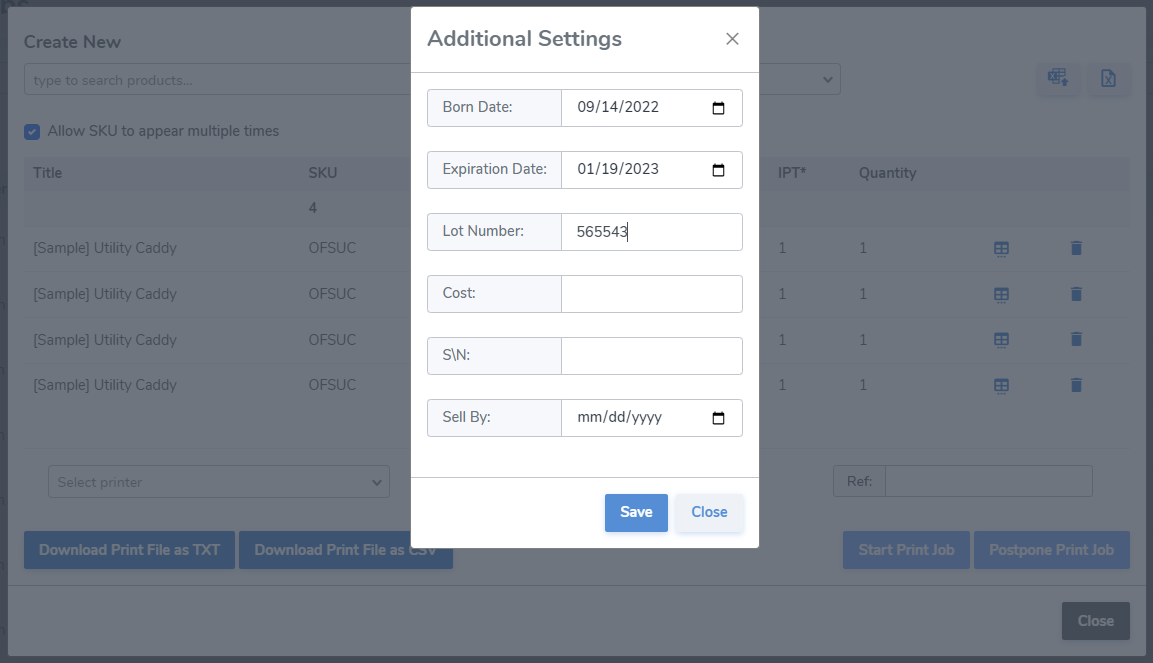
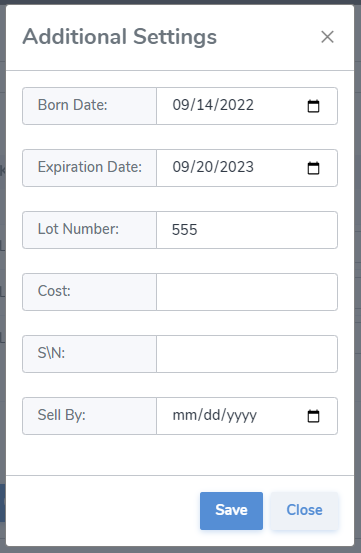
- Click the "Additional Settings" icon to the right of each line to open the EPC details pop-up.

- Enter the EPC level details and click Save. These can include Lot #, Cost, Expiration Date, and more.
- Repeat this step until information has been entered and Saved for each SKU.
- Finalize Print Job by selecting Printer and Label, and pressing Start Print Job or Postpone Print Job.
________________________________
2. Upload Details Via Excel Uploader
The second method is to enter the details into the Template spreadsheet, save, and upload.
- Go to the Printing tab located on the left side menu.
- Select your location from the Location drop-down.
- Click the "+" icon.
- This will open the print controller pop-up.
- On the top right corner of the pop-up select the Template icon to download the Excel template.

- Enter the details into the "Print" tab of the spreadsheet. The SKU and Quantity are mandatory fields indicated with the red asterisk.

- Save the spreadsheet.
- Return the print job controller pop-up window.
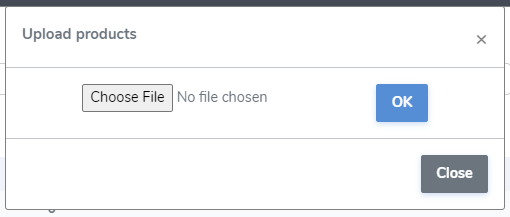
- Select the Upload icon (located on the top right corner of the window).

- Click "Choose File," to search and locate the template on your PC.
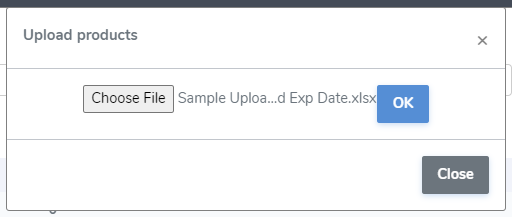
- Once you have located the file, double click it to add.

- After adding click "OK" to complete the upload.
- After uploading you will see the same SKU added multiple times.
- As well as the EPC detail information saved to the Additional Settings pop-up.
- Finalize Print Job by selecting Printer and Label, and pressing Start Print Job or Postpone Print Job.
Please contact support if you have any further questions.